
A plan holds the schedule; each product brings its own price. This article covers attaching products to a plan, setting a price for every duration, and offering the product for one-time purchase alongside the subscription.
There are two ways in, and they edit the same thing:
From the plan — best when you are pricing many products at once.
From the product — best when you are setting up one product and want everything about it on one screen.
Prerequisites
A plan with at least one duration. Products cannot be attached to a plan that has none.
WPSubscription Pro for variable products. The free plugin attaches simple products.
Part 1 — From the plan
Step 1 — Open the Products tab
Open the plan and switch to Products. A plan with nothing on it yet invites the first one.
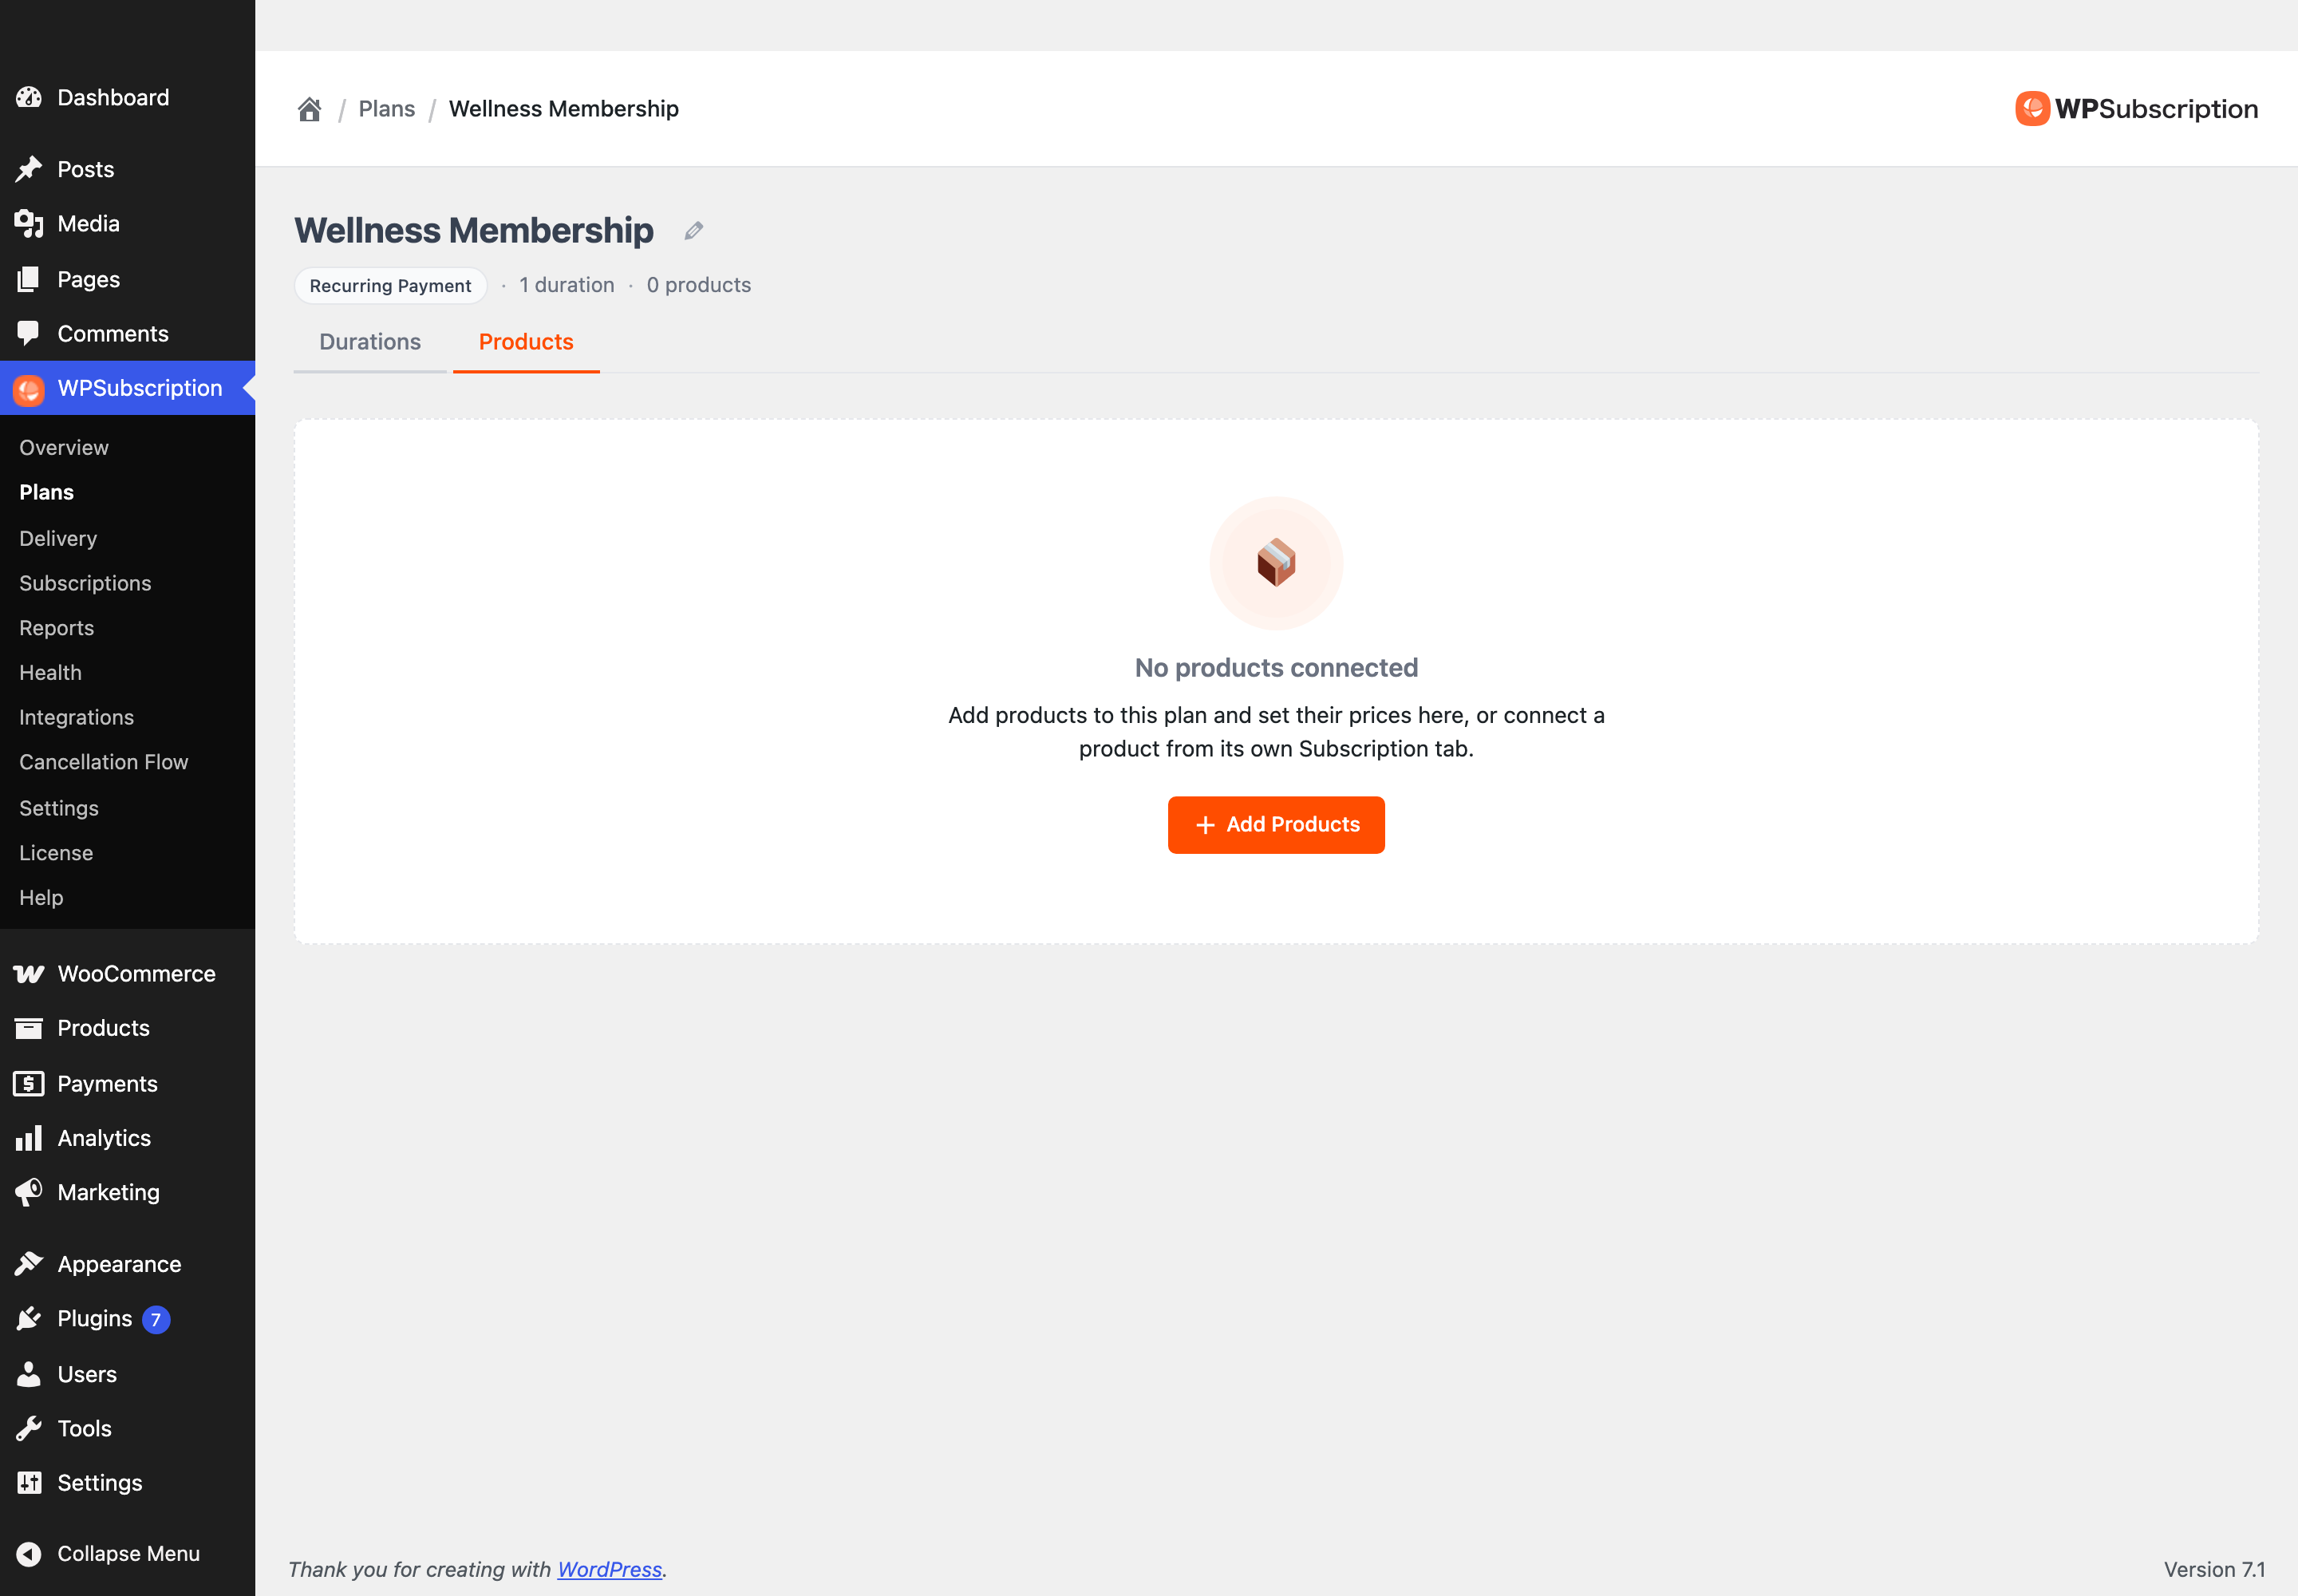
Step 2 — Pick the products
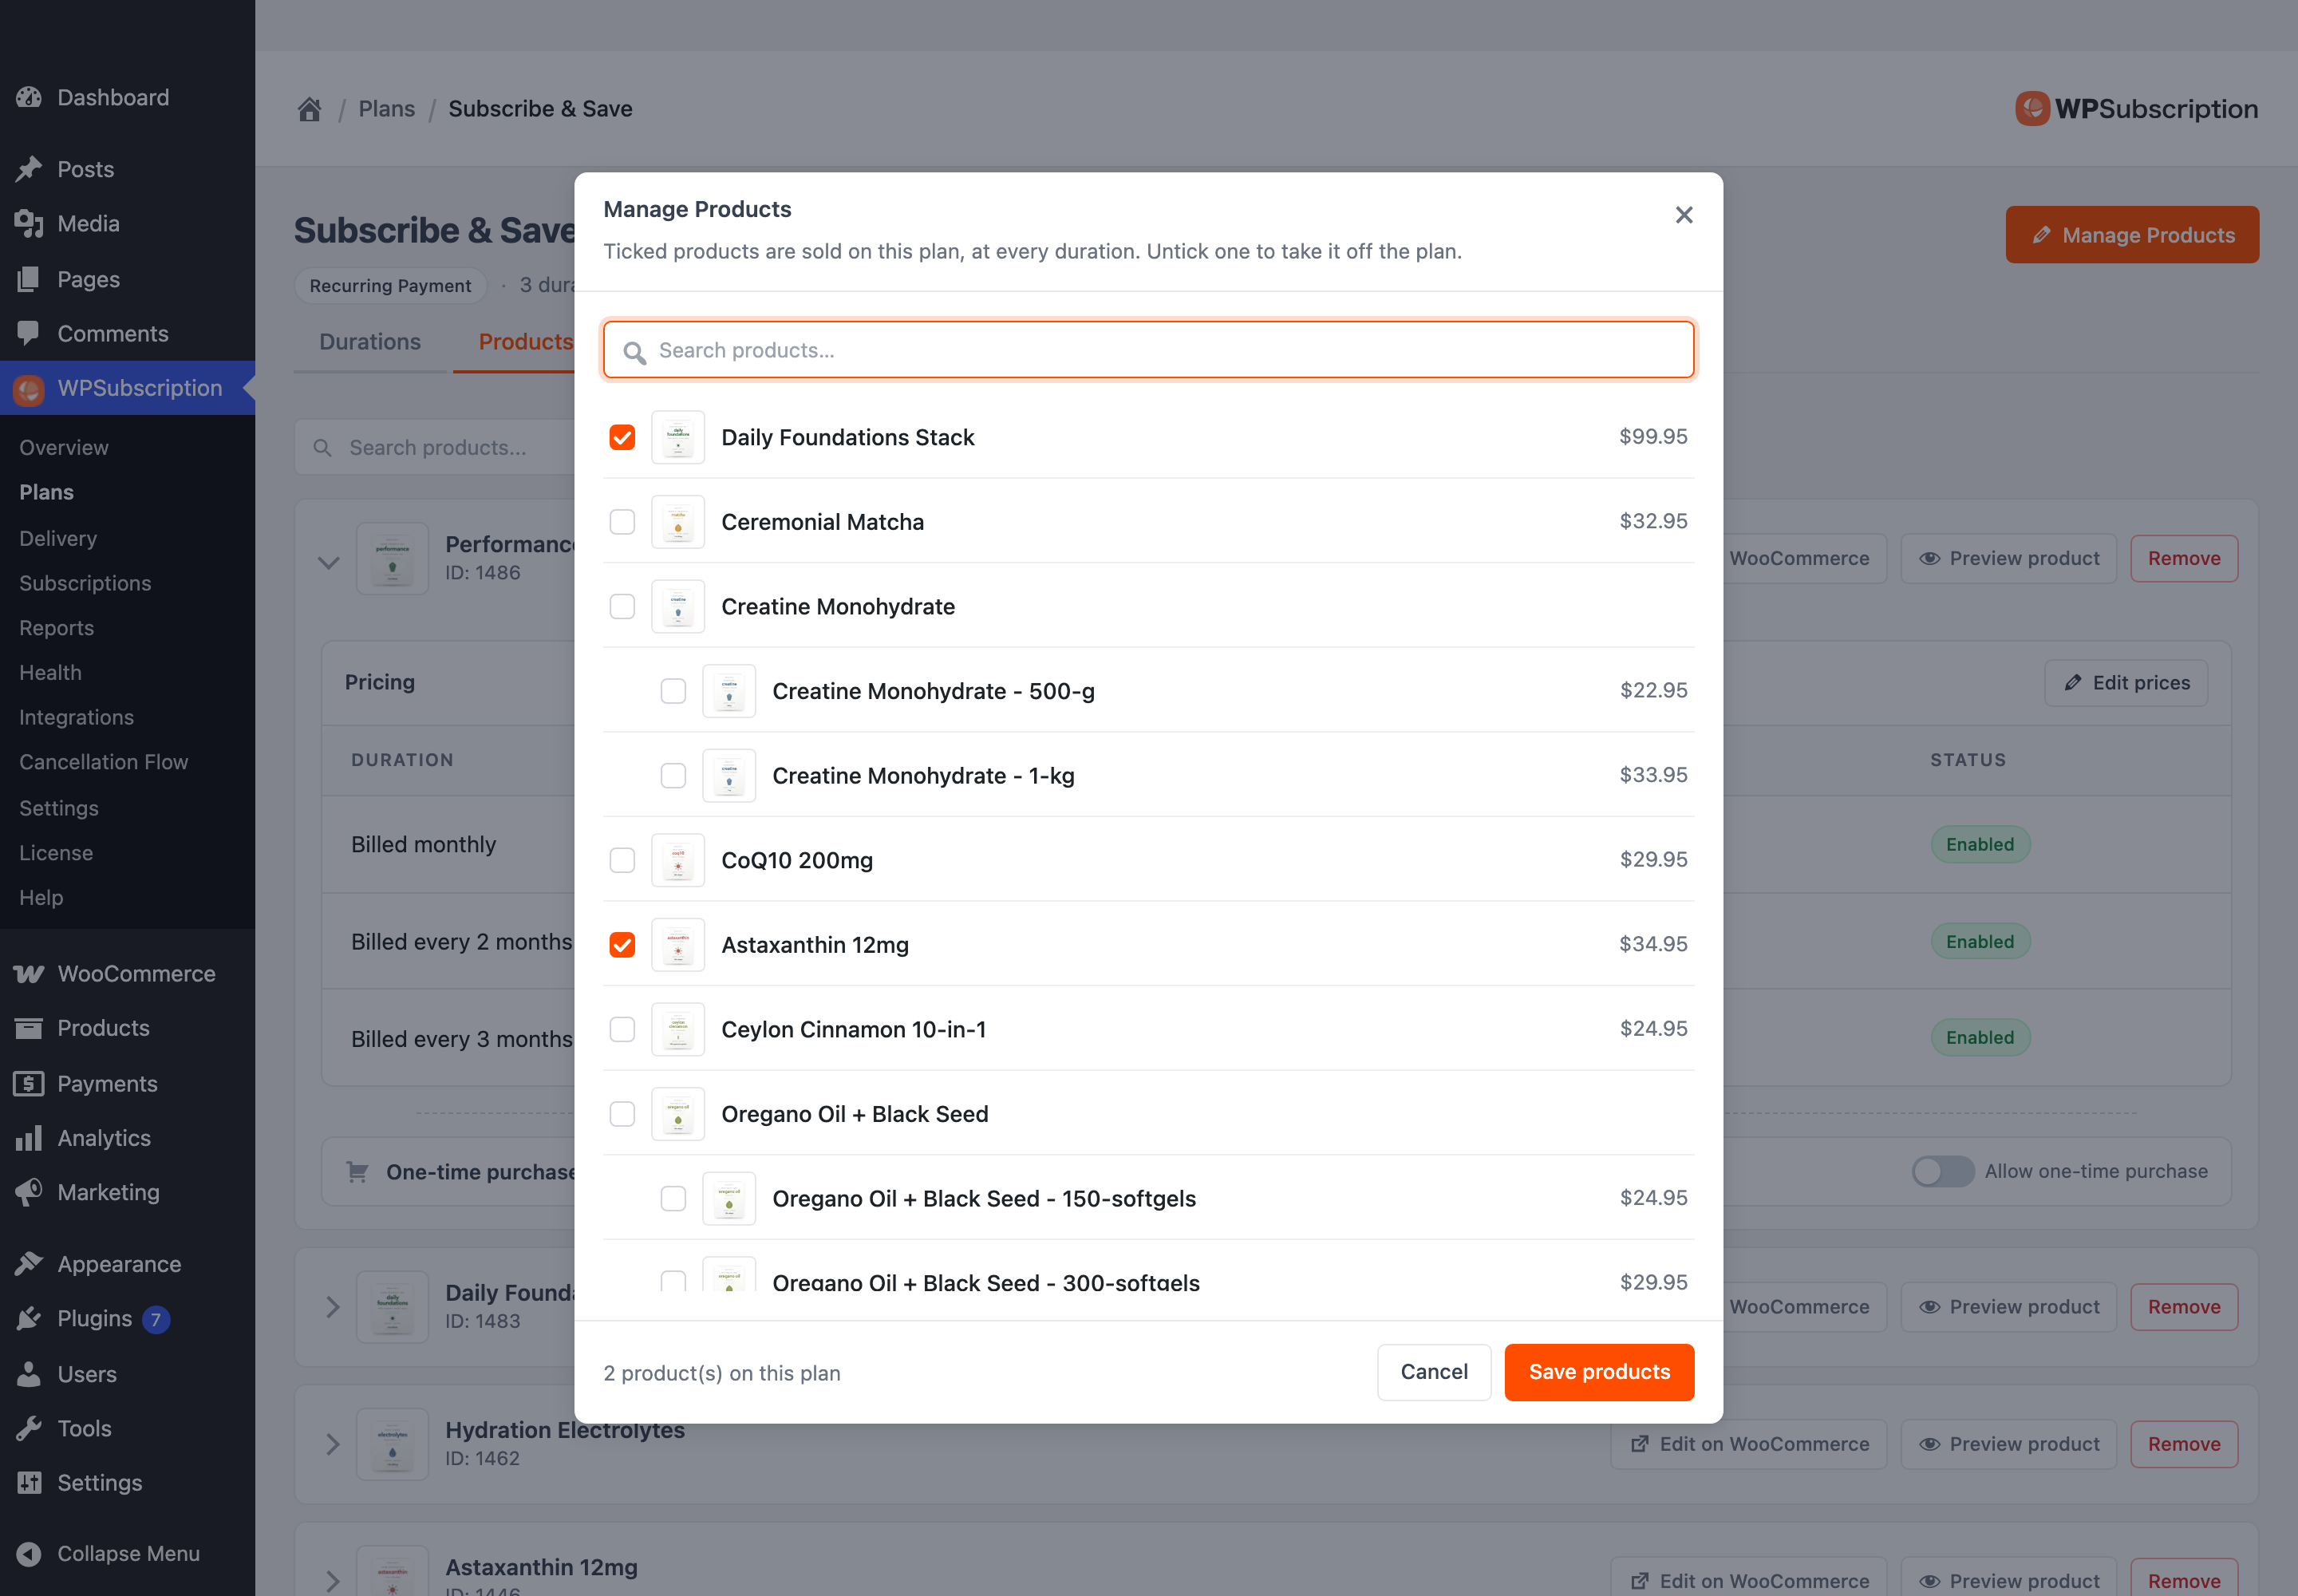
Click Add Products — or Manage Products once the plan already has some. Ticking a product puts it on the plan at every duration; unticking takes it off.
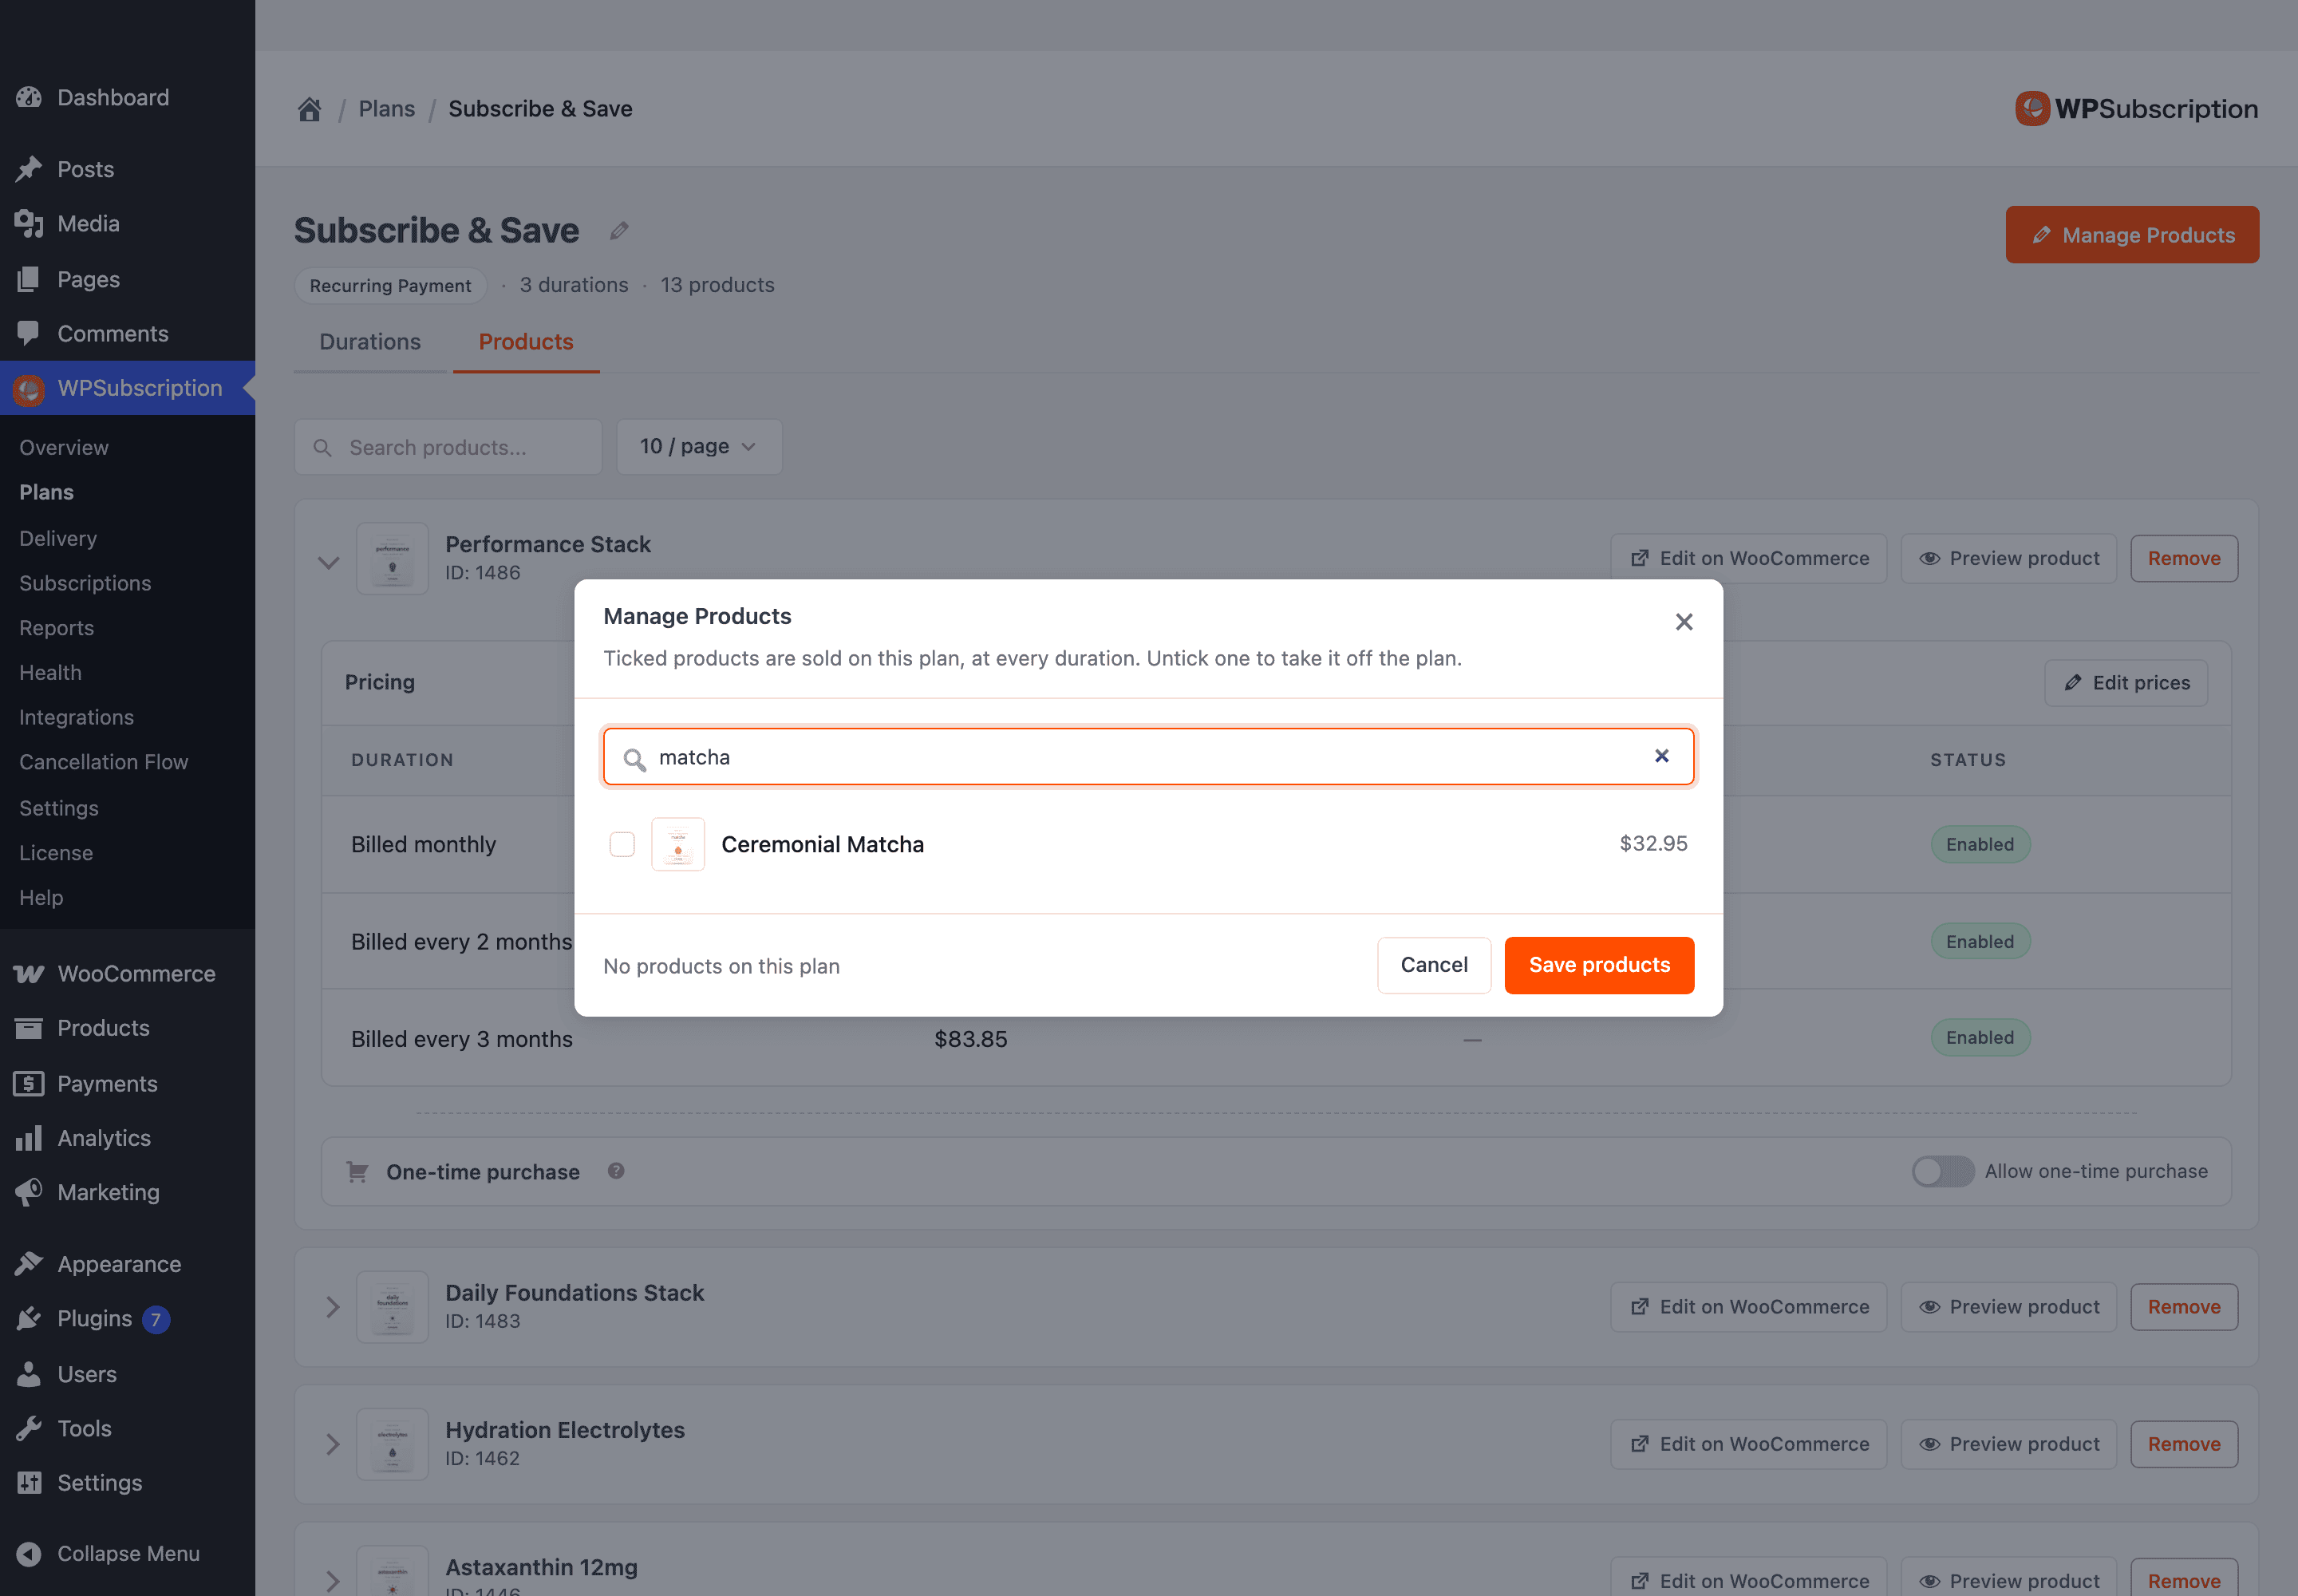
Search by name when the catalogue is long.
Click Save products. Each one arrives on the plan at the price WooCommerce currently shows for it, on every duration — a sensible default you then adjust.
Step 3 — Read the price table
The Products tab lists every product on the plan. Click one to expand its prices.
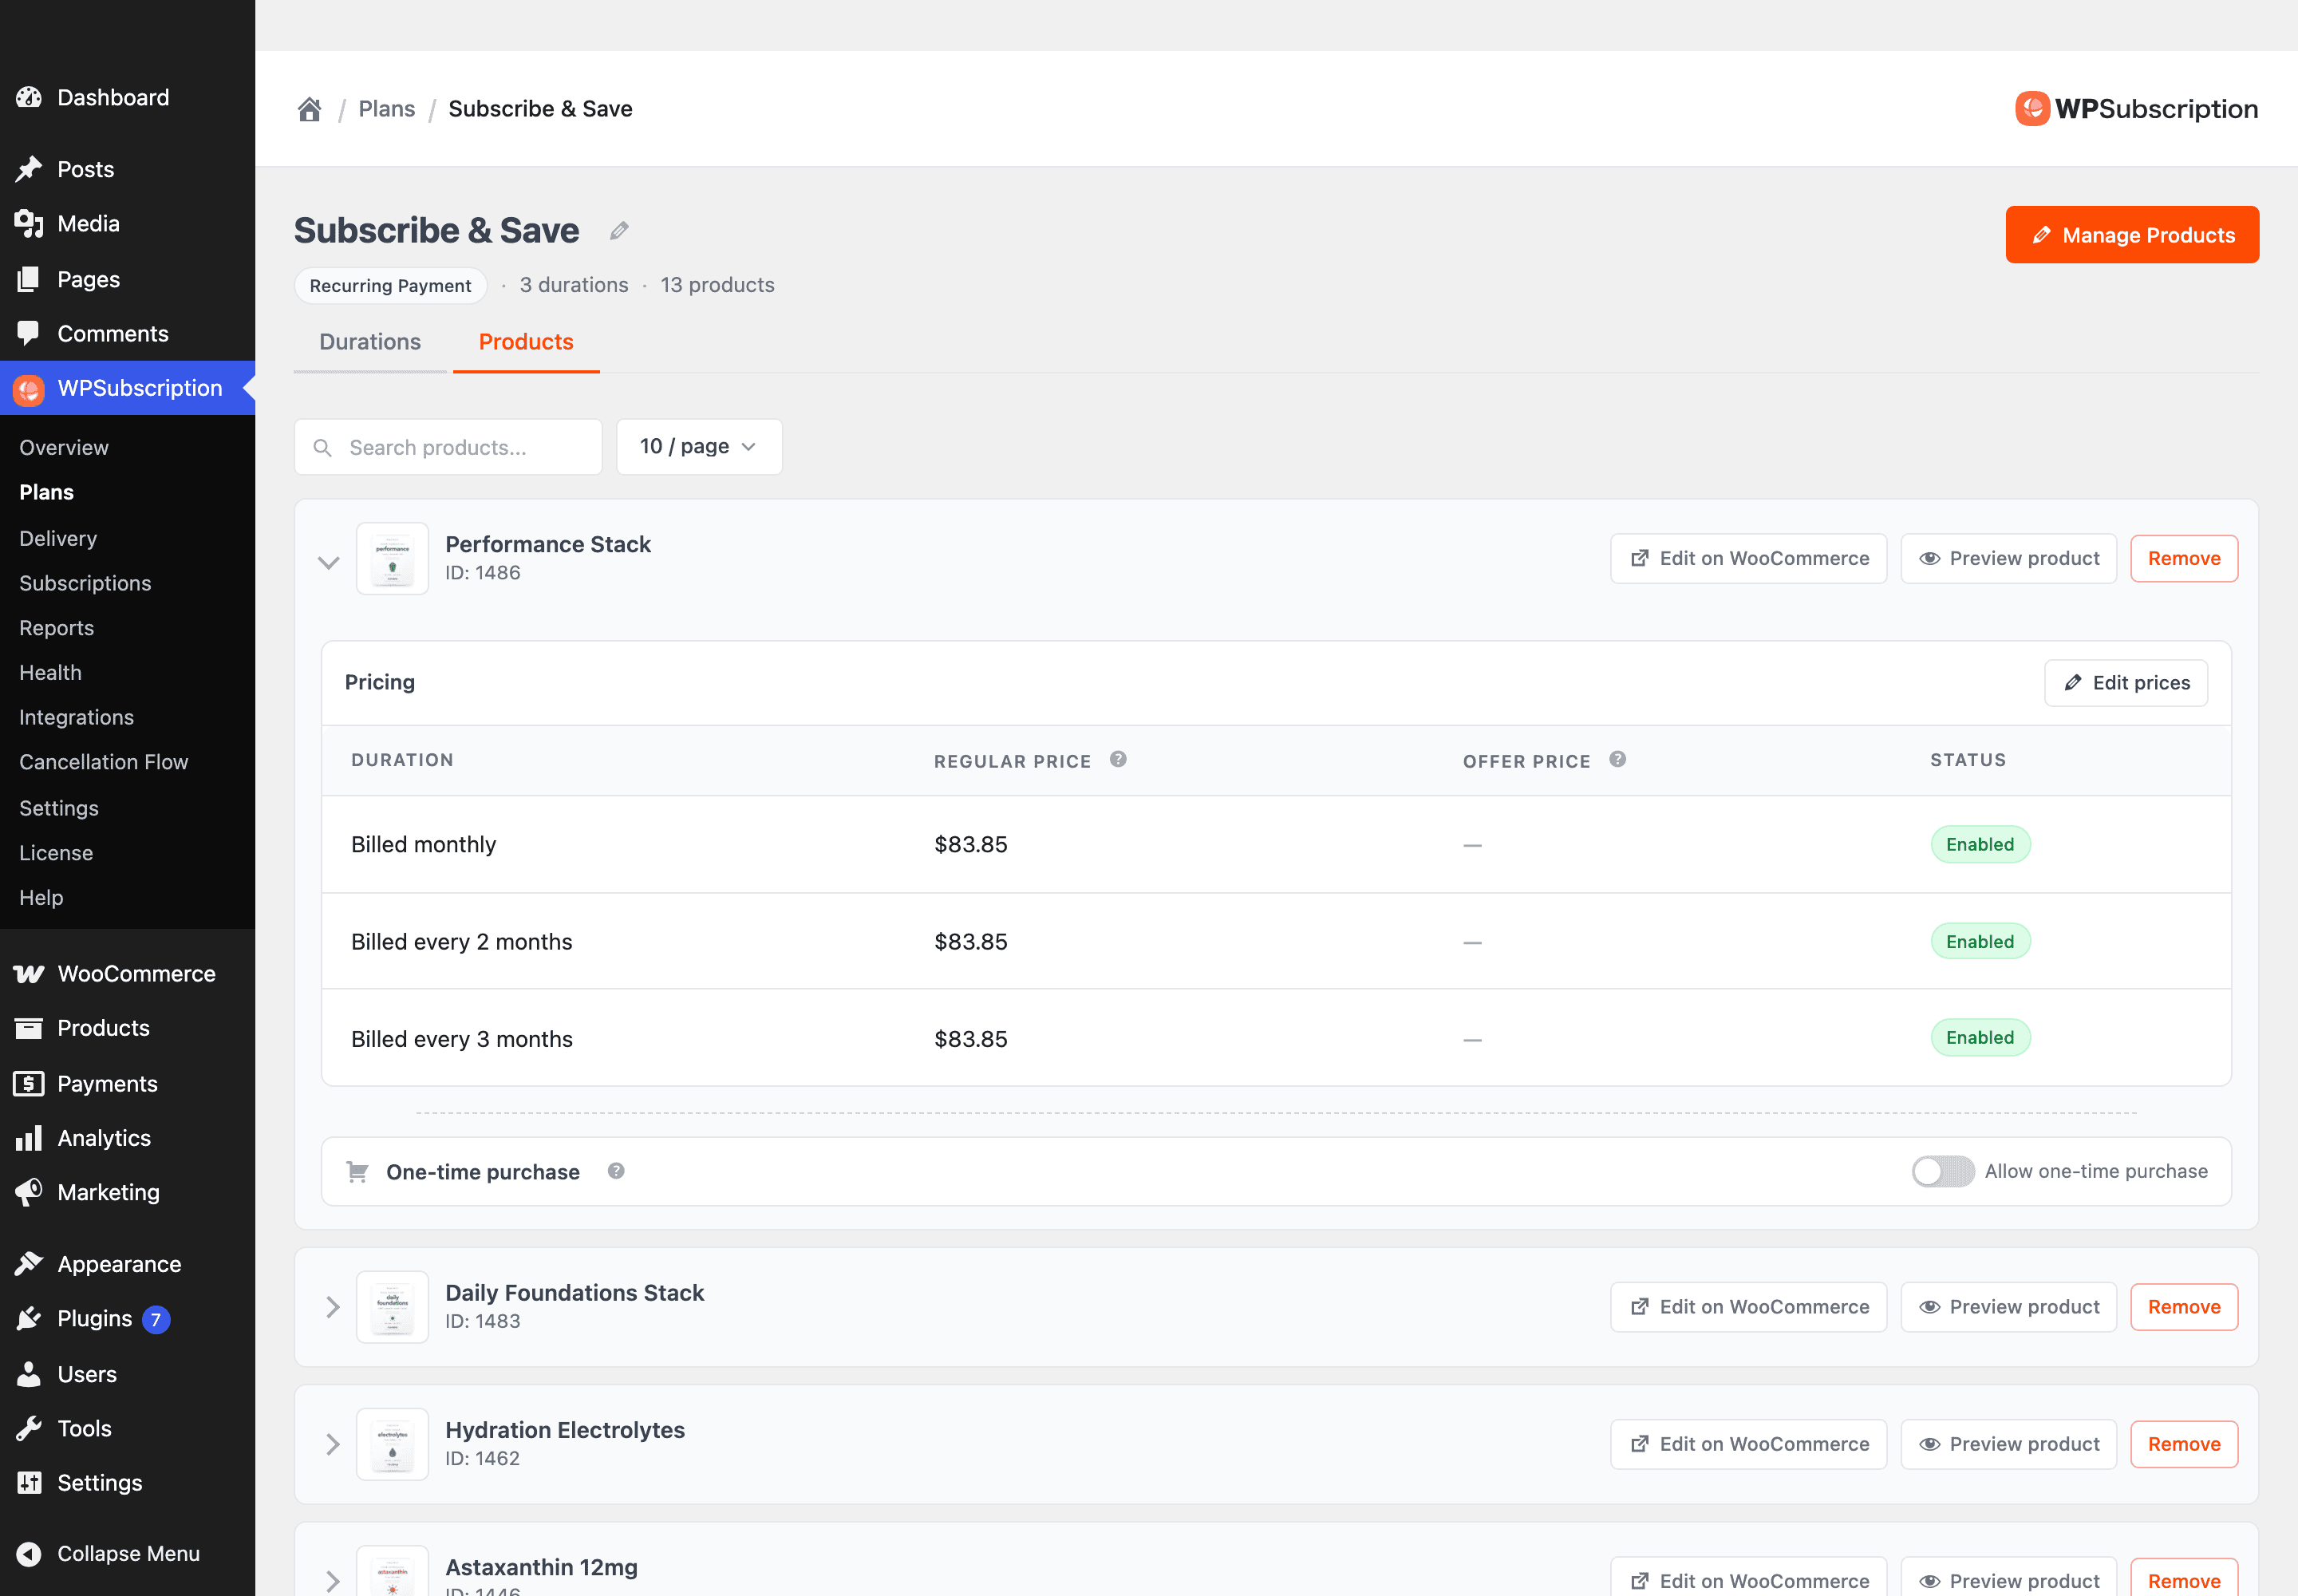
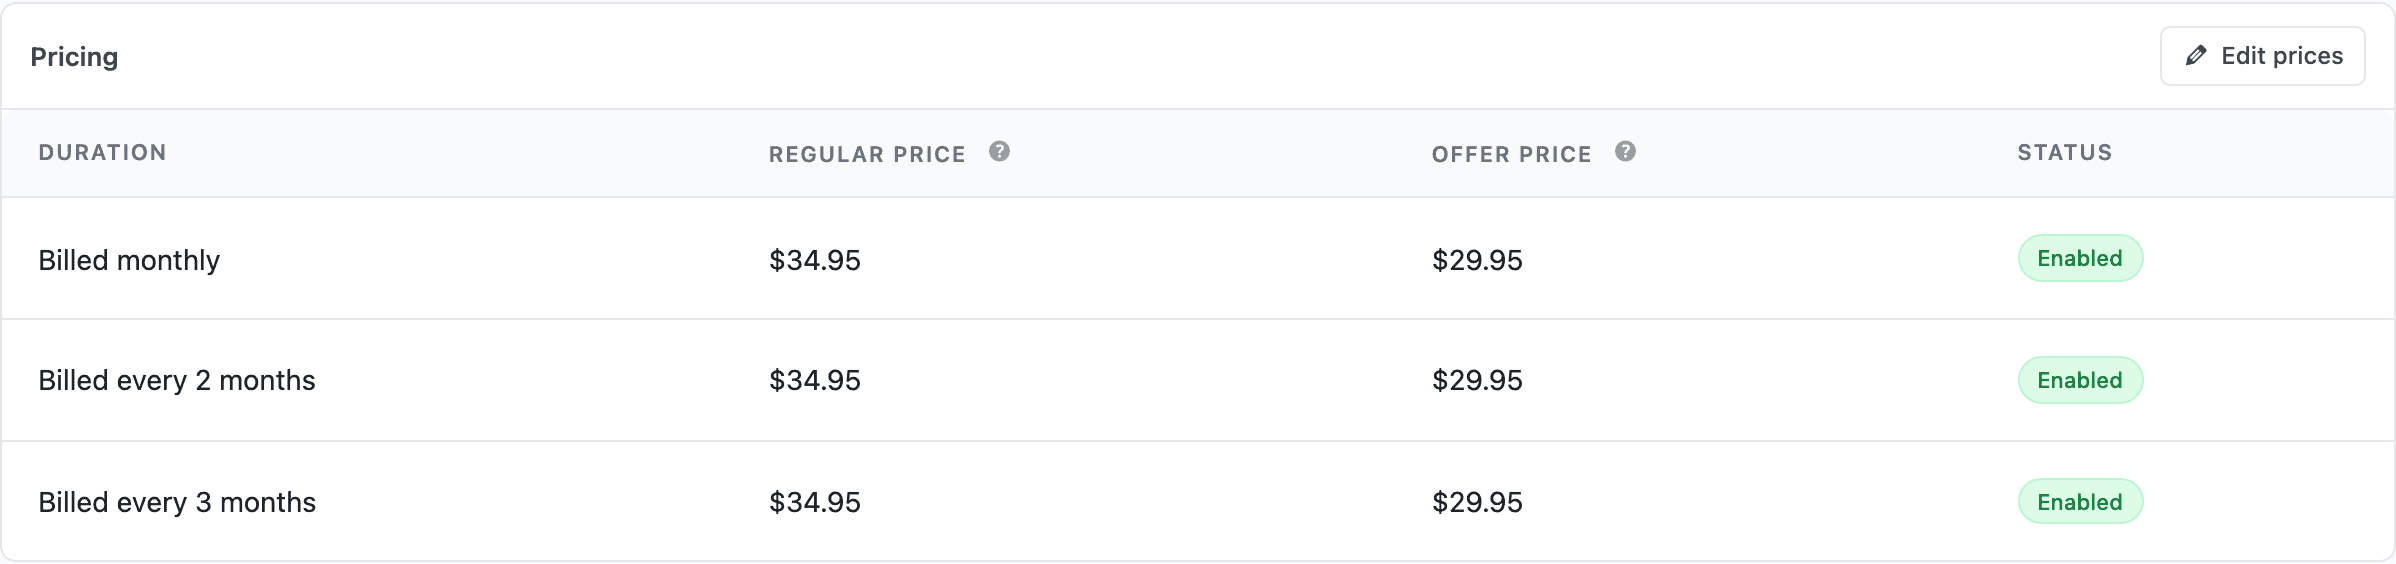
Column | What it means |
|---|---|
Duration | One of the plan's durations. Every active duration gets a row. |
Regular Price | The recurring price charged each billing cycle. |
Offer Price | A discounted recurring price shown in place of the regular one. Leave it empty for no discount. |
Status | Enabled means the customer can pick this duration for this product. Disabled hides that one combination without touching the rest. |
Note: When an offer price is set, the customer is charged the offer price — every cycle, not just the first. The regular price is what gets struck through beside it, and what the "Save 23%" badge is measured against. It is a permanent subscriber discount, not an introductory rate.
Step 4 — Change the prices
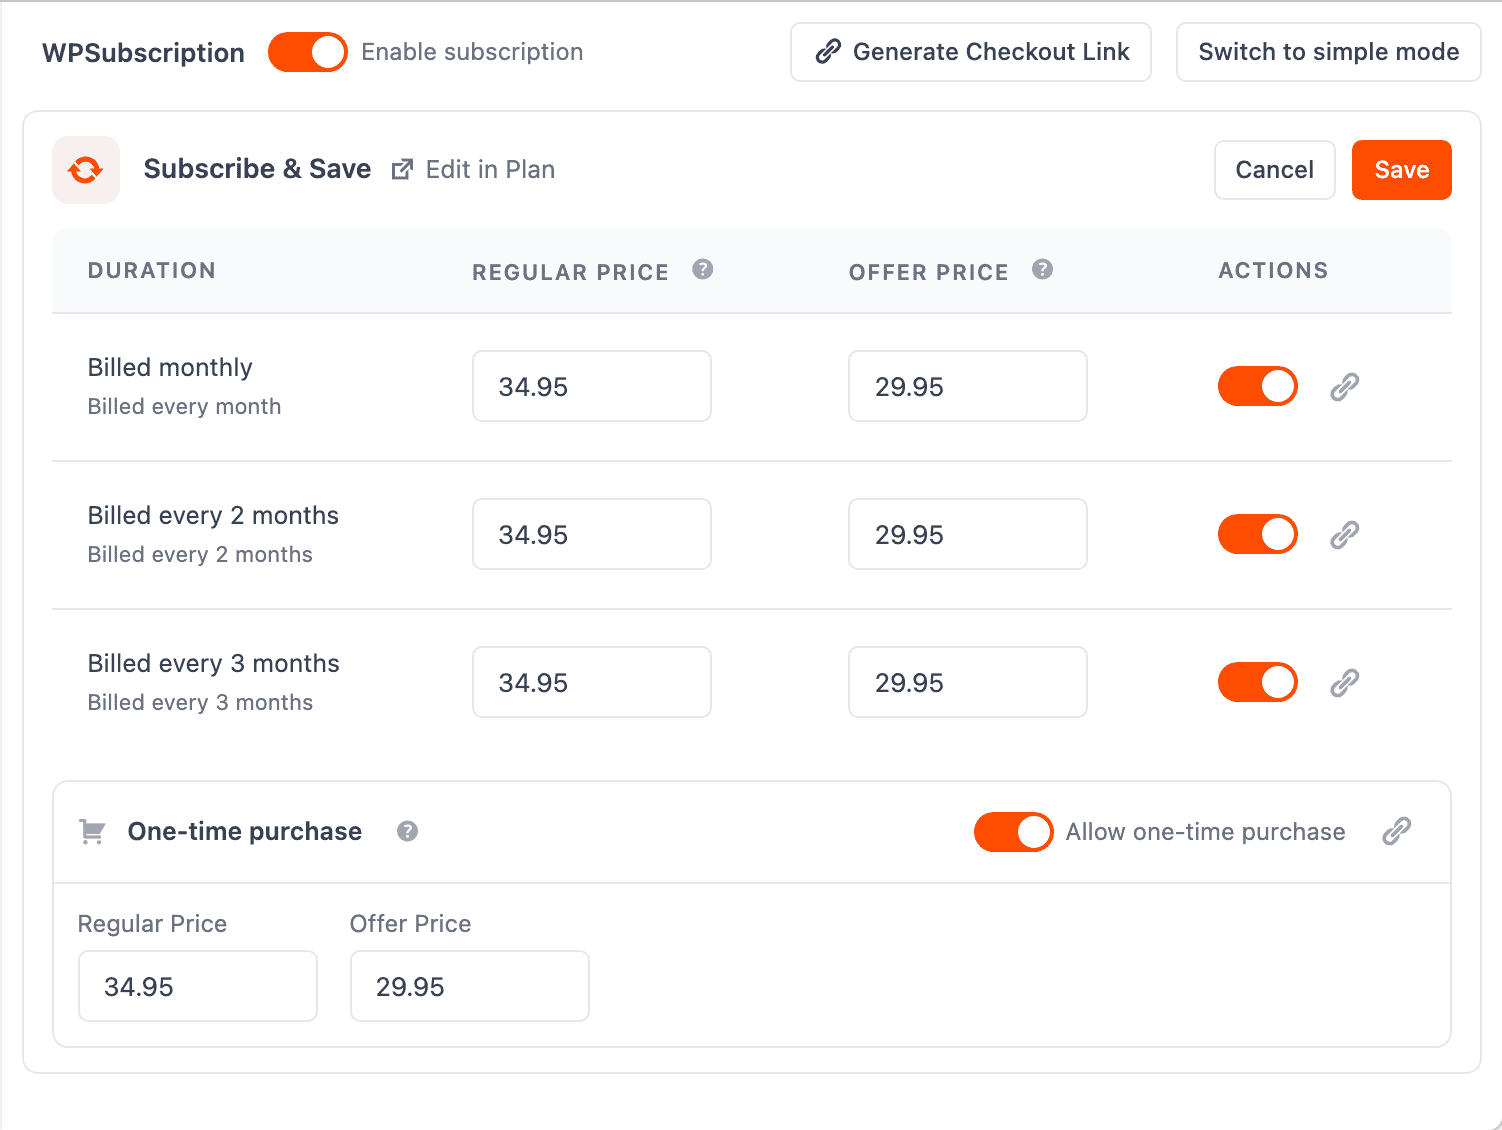
Click Edit prices. The cells become fields and the status badges become toggles.
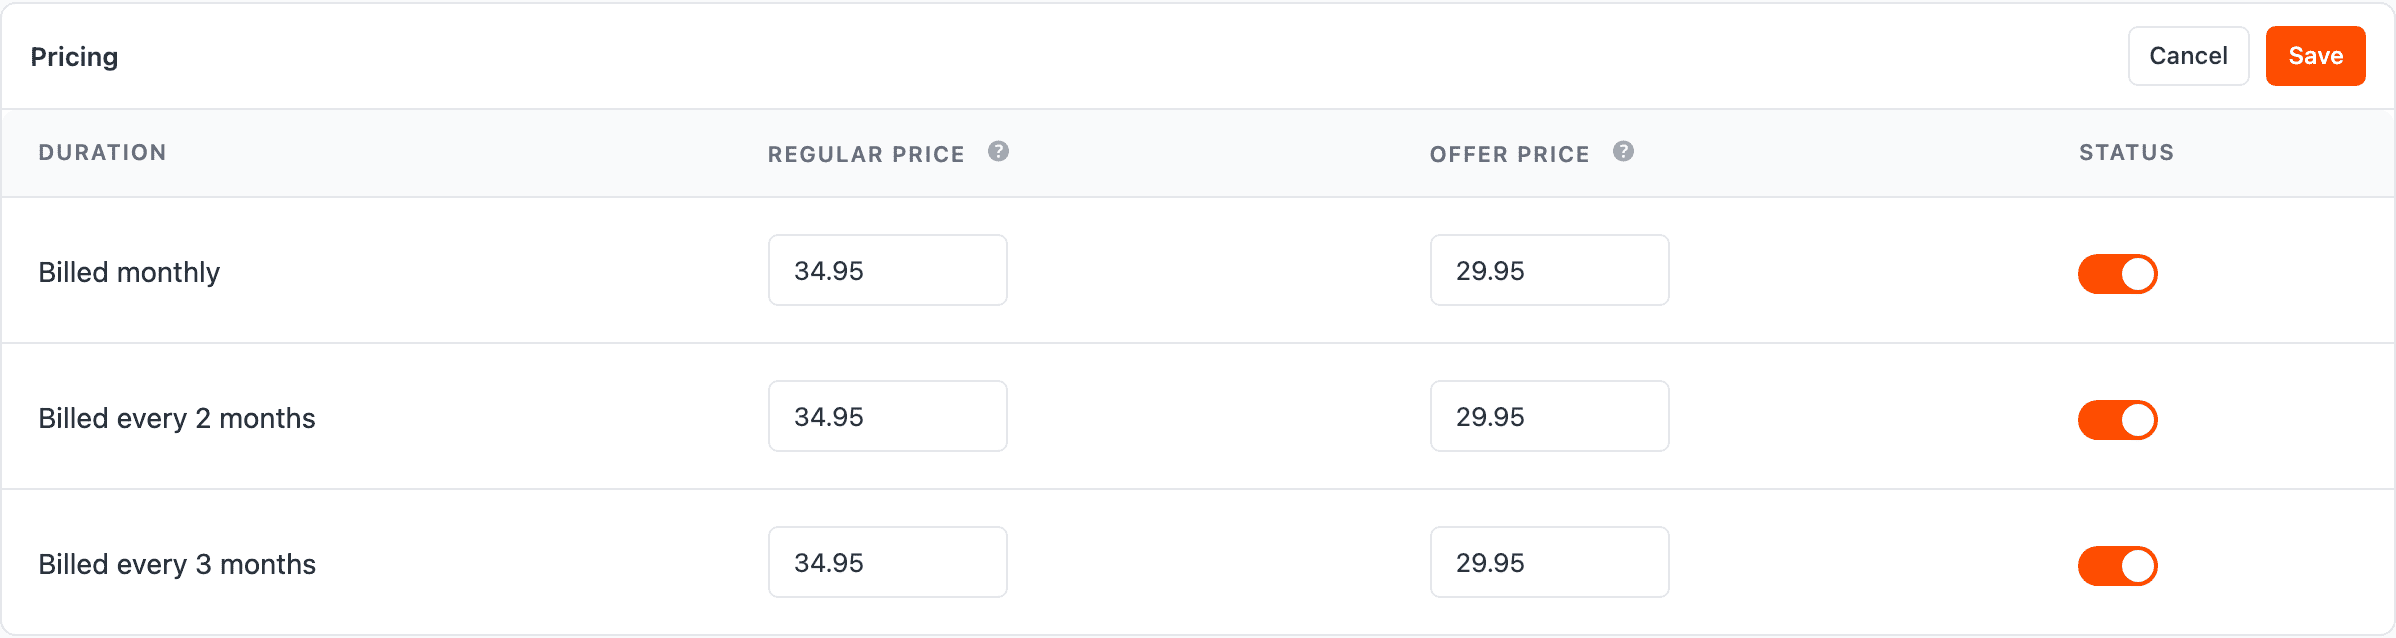
This is where a longer commitment earns its discount: charge $34.95 monthly, $29.95 every three months, and the quarterly button starts doing the selling for you.
Click Save. Prices take effect on the storefront immediately, for new purchases. Subscriptions already running are untouched.
Step 5 — Offer a one-time purchase
Underneath the durations is the One-time purchase row. Switch Allow one-time purchase on and the product page gains a second option: buy it once, no subscription.

The one-time Regular Price and Offer Price are the product's own WooCommerce regular and sale prices — editing them here edits the product, and editing the product changes them here. They are deliberately separate from the plan prices, which is what lets you undercut the one-time price with the subscription price and show the customer the gap.
Note: One-time purchase is per product, and on a variable product per variation. Turning it on for one variation does not turn it on for the others.
Part 2 — From the WooCommerce product
Everything above can also be done from the product itself, which is usually where you are when setting up a single product.
Step 1 — Open the Subscription tab
Edit the product and open Product data → Subscription. A product on no plan says so.
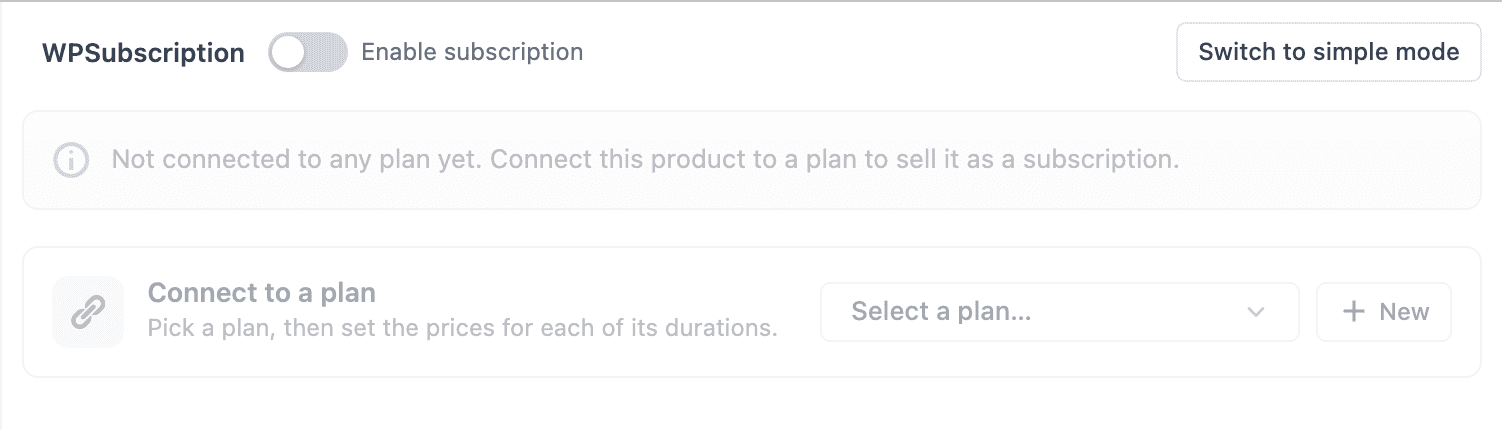
Note: Switch to simple mode, top right, goes back to the per-product subscription fields from WPSubscription 1.x. Products set up that way keep working; plans are an alternative, not a replacement. Back to plan mode returns.
Step 2 — Pick a plan
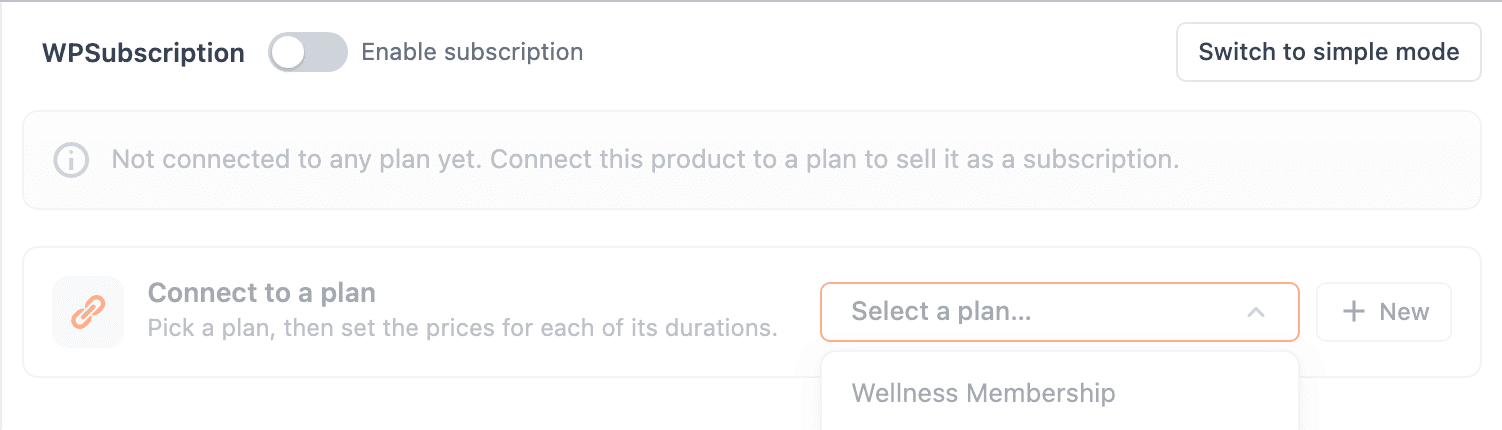
Open Select a plan… and choose one. Every plan in the store is listed.
Step 3 — Set the prices and save
Picking a plan opens the same price table, one row per duration, prefilled with the product's WooCommerce price — plus the one-time purchase row.
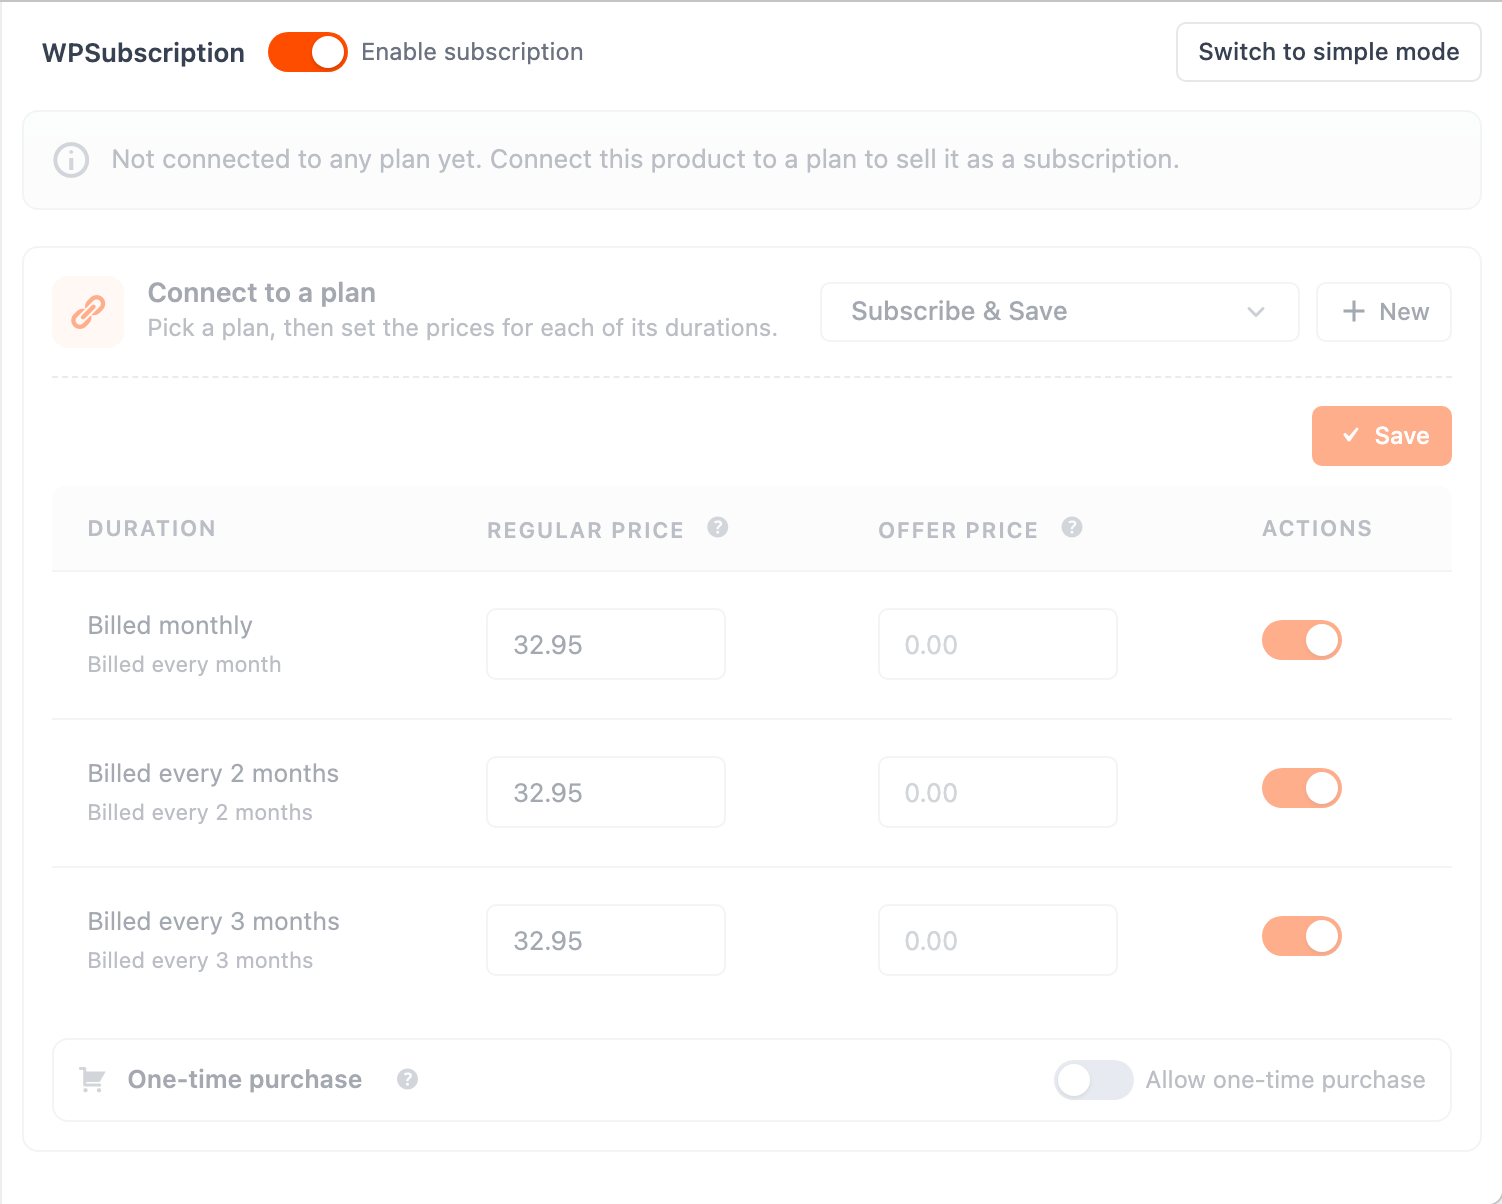
Notice that Enable subscription, top left, switches itself on when you choose a plan. That toggle is the product's master switch: turn it off and the product sells as an ordinary WooCommerce product no matter what plan it is attached to.
Click Save. The panel becomes the connected view.
Step 4 — The connected view
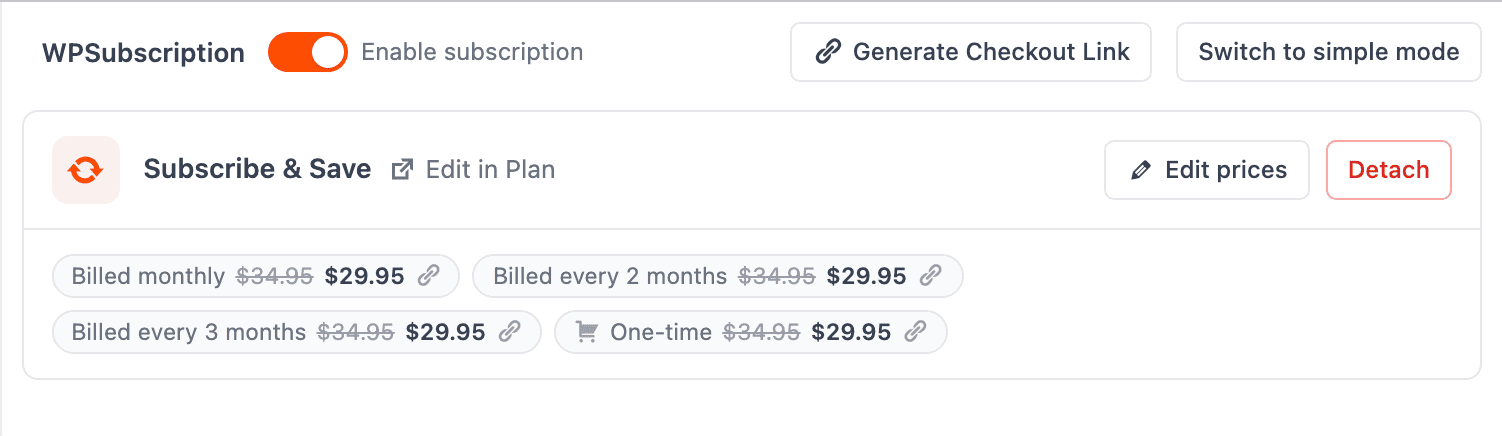
Each chip is one duration, showing the price the customer will pay — struck-through regular price where there is a discount. The chain icon on each chip copies a direct checkout link for that exact price; see Direct checkout links.
Edit in Plan — opens the plan, to change the durations themselves.
Edit prices — same table as before, in place.
Detach — takes the product off the plan. It stops being sold as a subscription; existing subscribers keep renewing.
Variable products
Note: Variable products require WPSubscription Pro. In the free plugin, plans attach to simple products.
On a variable product the panel shows one card per variation, each with its own prices and its own one-time option — so 150 softgels can be $24.95 a month while 300 softgels is $34.95.
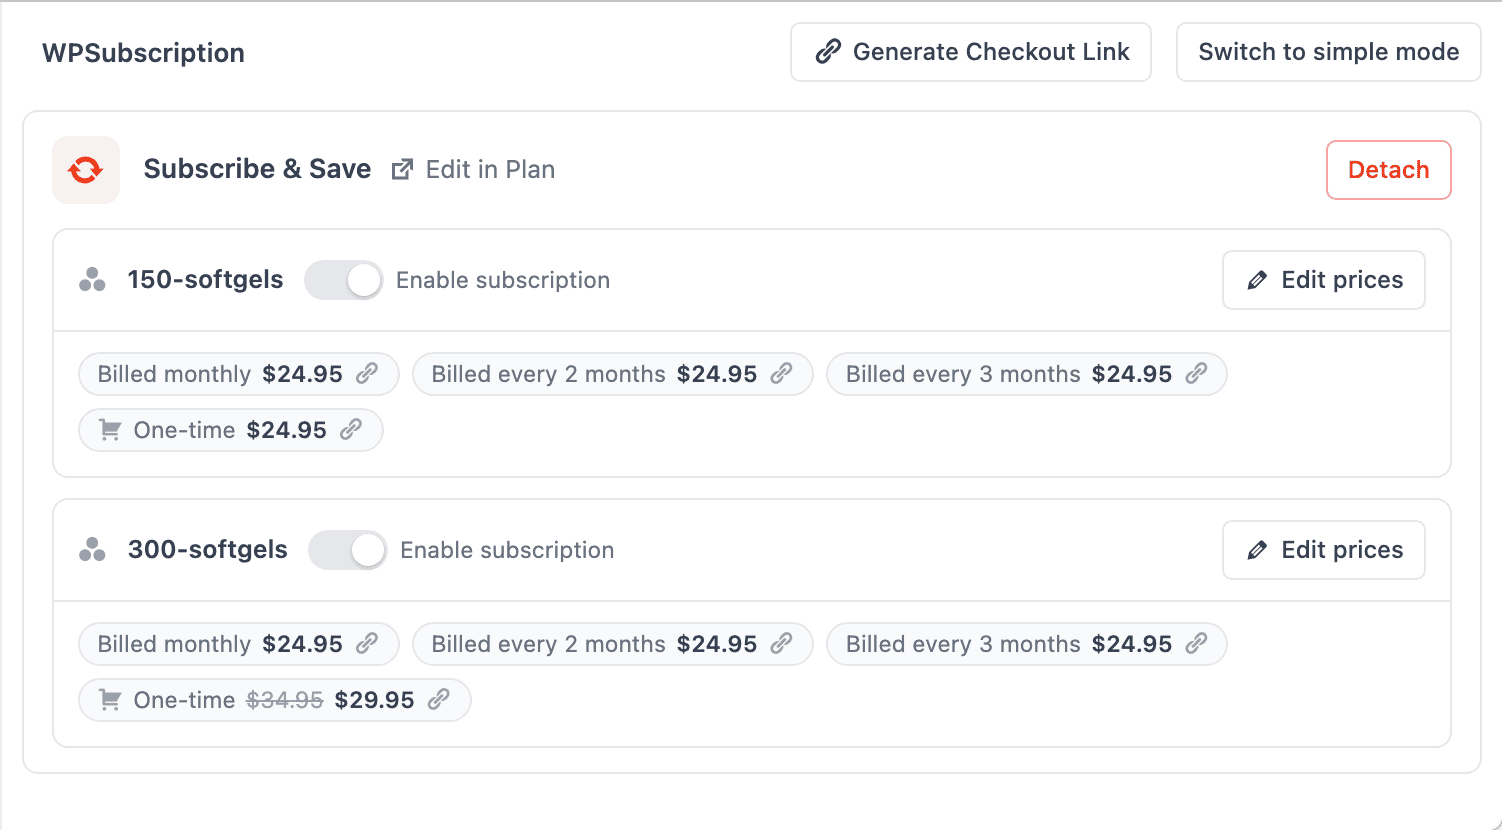
Attaching the plan to the parent product gives every variation the same prices to start from. Edit any variation's card to break it away from the rest.
Free and Pro
Feature | Free | Pro |
|---|---|---|
Attach simple products to a plan | ✓ | ✓ |
A regular and offer price per duration | ✓ | ✓ |
Enable or disable one duration for one product | ✓ | ✓ |
One-time purchase alongside the subscription | ✓ | ✓ |
Attach and price from the plan's Products tab | ✓ | ✓ |
Variable products and per-variation pricing | ✗ | ✓ |
Remove a product from the plan's Products tab | ✗ | ✓ |
Create a plan from the product editor | ✗ | ✓ |